
I recently started accepting commisions from people. I mostly re-create jewelry pieces that they like, for a cheaper price and out of polymer clay and cheaper materials. One such project I worked on recently is an Egyptian Eye of Horus. I actually have no idea where the original jewelry is taken from. (If someone could enlighten me on that it would be awesome) The client requested progress photos so I took them. I normally don’t take progress photos, but since the photos are here I might as well share them with everyone and do a little tutorial.
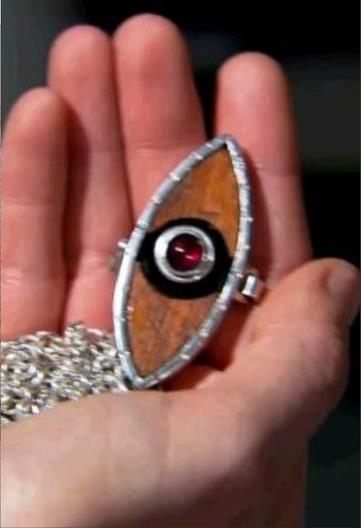
Here (above) is the reference photo that my client gave me. (I have no idea where she took it from, pardon if anyone is the original owner). Judging from what I saw I thought initially we can use wood, polymer clay, and metal findings from it, and it looks approx. 2 inches or more based on the photo.
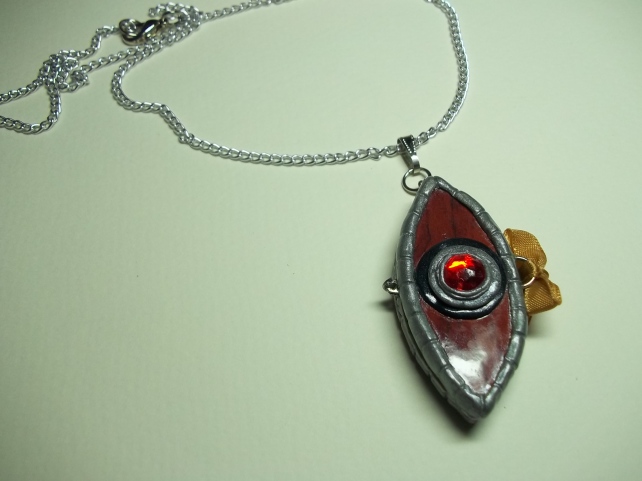
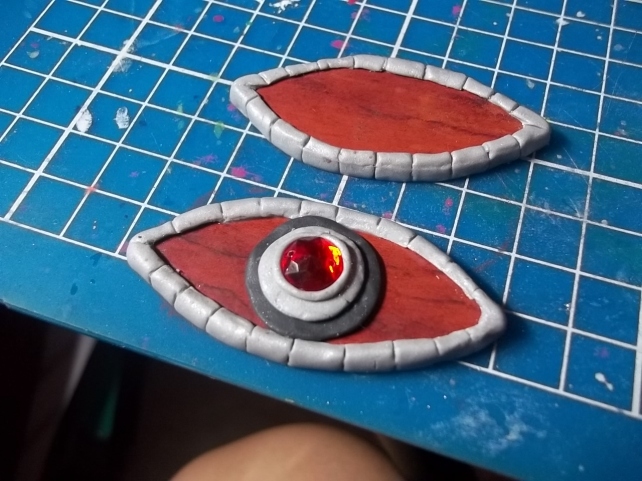
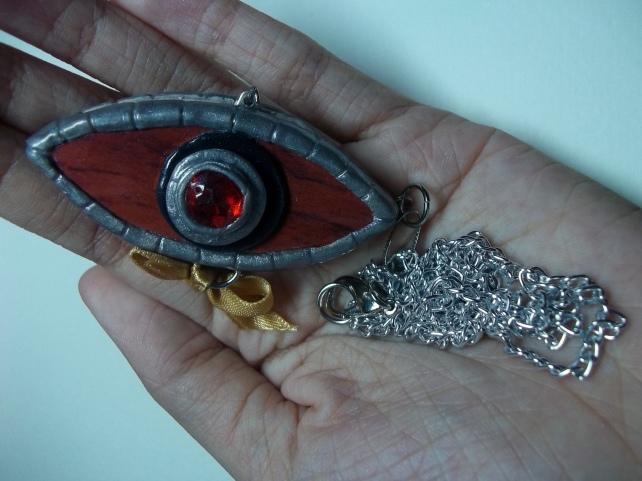
Here is my version, the best I can do for now. For now the only way to close the locket is by a ribbon; I have no metal findings of locket locks around. 😦
MATERIALS | What you will need:
Polymer Clay (I use Sculpey III and Sculpey Bakeshop for this project)
Silver Pearl Ex Powder (optional but really makes silver clay stand out more)
Sculpey Glaze Gloss (optional, but I tend to put gloss on silver to make it seem more metallic)
Wooden texture sticker/template
9mm cut red stone
Metal Findings
Lots of Patience
TUTORIAL | Instructions

I take the shape of the locket and make a base for it out of polymer clay. I used beige here, but the color hardly matters as this will be covered up anyway. You can make a template on paper, use it to cut your clay to two identical pieces.
Bake the clay as the baking instructions of your brand indicate.
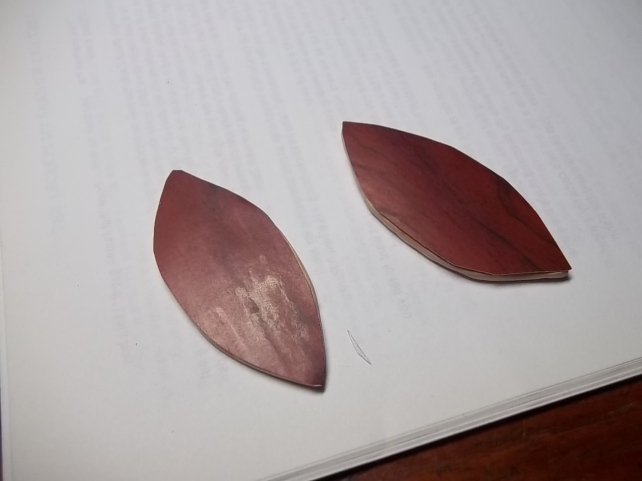
Take your wood texture, trace the two clay pieces onto it, and cut them out. The texture I used was from a wallpaper roll I bought a long time ago in a hobby shop; you can buy it at hardware and household stores too. I only used this because it was available along my on-hand supplies, but otherwise you may also print out a texture on board or sticker paper. If you’re not sure your sticker paper is good enough to withstand the oven/worry it might melt, i’d go for board/ordinary paper instead.
Stick your wood texture to the clay pieces. I stuck them onto the clay with some liquid clay–i’m not entirely sure how superglue and such react to being baked.
Voila, you now have a faux wood base for your locket. 😀
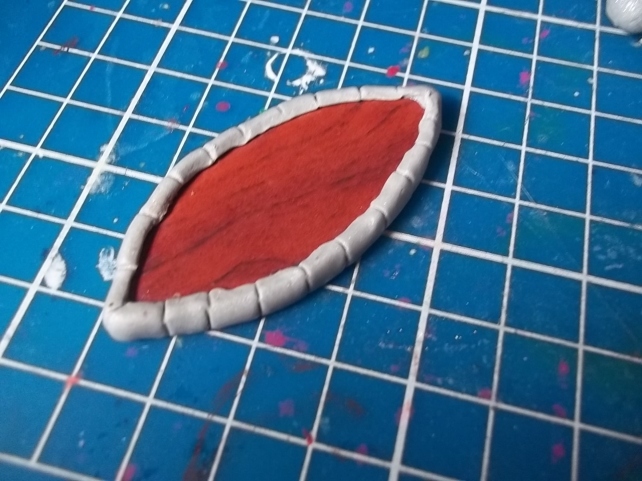 Grab your silver clay, knead it, and place them along the edges of your “wood” base, creating lines and creases like in your reference photo. Do it for both pieces.
 Take some black and silver clay to make the details in the middle. Use the stone as a guideline on how big to make the silver part around it, but as a warning, if your stone is plastic/acrylic DO NOT BAKE IT. Take it out after you make the appropriate measurements.
IMPORTANT! Make the necessary holes for any metal findings you want to attach before baking!
OPTIONAL! Coat the silver parts, using a slightly damp brush, with some silver PearlEx/mica powder. I like doing this to silver clay, really makes the silver look metallic as opposed to a dull finish.
Bake everything according to your clay’s instructions.
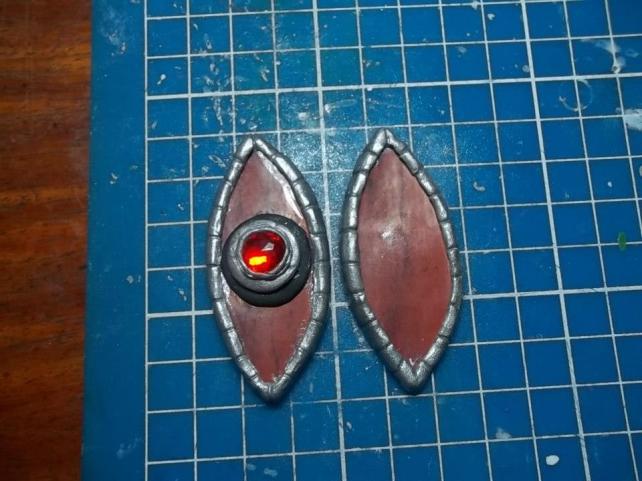 After baking, this is what you would have. Clean up some residue of the silver powder with a damp Q-tip and then coat with gloss, if you desire.
In this reference photo (above) I hadn’t stuck/glued the stone yet, I just placed it there to see how it would look like. I still have one baking session to go, so I wouldn’t glue on the stone yet.
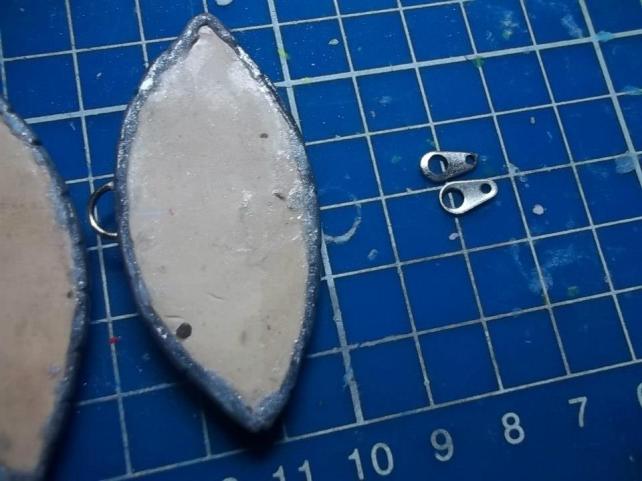 Now is a good time to insert the metal findings you plan to use. Here are the ones I chose. I improvise and decided to use these necklace locks (right side) to attach the two parts together to form a locket.
I’ll superglue the metal findings to the mid-sections of the inner parts of the locket, where I want them to connect. It’s important to see if they line up!
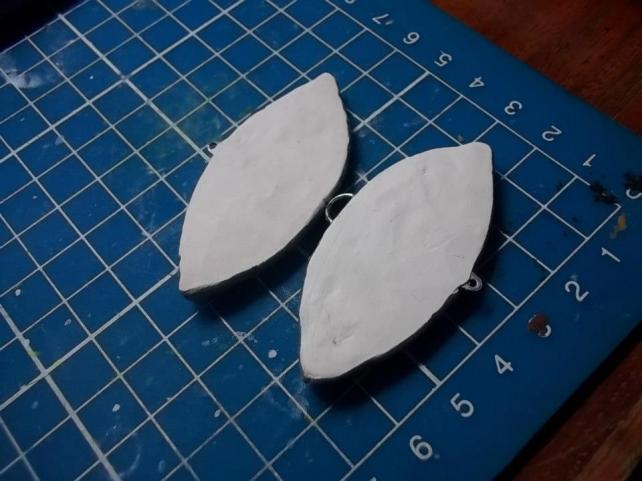 Then I will cover over the insides with some clay–a very thin sheet is advisable. I used white Sculpey Bakeshop for this because it’s very soft and it’s pretty easy to get it very thin. The white layer will keep the metal findings I secured in place and will hide the ugly insides.
Bake again according to your clay’s instructions.
You won’t be doing anymore baking after that, so it’s finally a good time to glue the stone.
Lastly I coated everything with gloss again, connected all the metal findings, and made the chain necklace. I hope my client likes it. *nervous*
Hope this helped! Feel free to check my Facebook crafts album here. For any questions, don’t hesitate to drop a comment below!
Have a good day~
– kageshoujo


Polymer clays look fascinating! and plus the fact you’re earning from it.
Fascinating indeed. It’s helping me earn a little extra apart from my regular wage. How’s the four-leaf clover I made for you? 😀
I lost one of them in Lyce, sorry. The other one I’m sure I still have it.
The original idea came from a popular kids show on nickelodeon House Of Anubis which the locket from that show was given to the main character (Nina Martin) the locket has many powers
Thank you so much for sharing. ❤
my locket turned out great youre so awsome
Pingback: Tutorial: Irisviel’s Brooch and Faux-Wood Effects « Three Smitten Kittens
polymer its fimo right?
Yes, it’s also Fimo. :)) Fimo is actually a brand, but it’s all polymer clay.
I think it is FANTASTIC !!!
I have always wanted on and that is perfect.
Only one question ,Is it really thick?
Thank you!
You can make it thinner if you wish. This tutorial pics shown here are of my first time making it (I made mistakes to this so it ended up thick) so if I would remake this I can certainly roll and make it thinner.
Hey I’m gonna try this soon when I get what I need but the metal parts witch parts of them do I use for the part that opens the locket for accual opening part I’m going to use little magnets but for the part oppisite that what do I use? 🙂
Well, I just made-do with materials I had on-hand here, but I suggest you get small hinges for that part. 🙂 Hope it goes out well!
Pingback: Tutorial: Irisviel's Brooch and Faux-Wood Effects - Three Smitten Kittens
Hello, I would like to apologize to create the eye of horus but I can not do the right shape. Could you tell me how to do or maybe send me a file with the right form. I do not know if I explained, I’m italian and then I used the translator.
Sorry this is a late reply! To get the right shape, I usually just draw the shape first on a piece of paper and then cut it out and lay it over my clay.