Elsa Snowflake Hairpins Tutorial (Custom Shapes in Resin)

Hello everyone! Today my tutorial post with be about making Queen Elsa of Disney’s Frozen’s hairclips. This can also serve as a tutorial on how to cast custom shapes in resin, whether it’s snowflake or not!

Elsa’s snowflake earrings have a semi-transparent and sparkly quality to them that I thought was best-suited for a resin project. I chose to do the color in icy blue because that would really make it icy! You can also choose to do it in silver or any color/variety you want.

 photo frozen_elsa_zpsbf17c6c1.jpg

Continue reading

Quick and Easy: Fabric Painting with Stencils

Quick and Easy (and cheap too xD) time this week! Today we deal with something every costumer or cosplayer had probably thought of–fabric painting. Sometimes characters wear clothes with specific patterns that can’t be readily found in fabric stores. I’m going to run everyone very quickly to a technique I use–making and using stencils for fabric painting. ^^

yuffie-collageYuffie was my first ever cosplay way back 2010. So very sorry for the blurry photos, our cameras were a no-go back then. xD She has very specific floral patterns on her shirt that I did using this technique.

You’ll need some paper, cutters, a pen, a brush, and your acrylic or fabric paint. That and your reference photo. And that’s really all you need. ^^

Continue reading

Few tips for Cosplayers | Photoshop

sh0p9

Quite awhile ago I found a question in the local Cosplay Ask group on Facebook. The question was how you make your skin like the reference posted–totally even skintone, heck, without even the trace of an eyebag or puffiness. I don’t know if it’s even realistic, since it’s really doll-like in quality at best. It’s a popular look for Asian cosplayers.

While I love make-up and I think it’s the best solution to that problem–quality products used,  good concealer, etc–we can’t deny that such things are already “retouched” and post-processed. So here I present to you…

sh0p0

Lo and behold, my Photoshop “cheat” guide to OMG KAWAiiDESU-NESS!

Continue reading

Quick and Simple (and Cheap!): Prop Sword

It’s Quick and Simple time–and this time, Cheap too! We’re making a Prop sword for your cosplays (or school project needs) that’s made of cheap, recycled materials that you might already all have at home!

First, I suggest you check on this tutorial by Crimson Shirou (click here for link!) as this step-by-step of my own was inspired by his. The tutorial from Crimson Shirou will result in a sturdier, more durable sword, while mine below uses more economical and easy-to-acquire materials (especially if you live in the Philippines).

sword thingy

Continue reading

Wig Fix for Shiny and Sparse Wigs

As some of my peers know I am ultra fond of picking up wigs on the cheap and then doing my best to rescue them with some washing and brushing. Most the wigs I’ve picked up though are of nice quality despite their extra low prices. But today my challenge came in the form of a wig that was not just shiny–it was sparse too. D: You can see the wig netting at the back, even, which is a big disappoint and turn-off to any spectator if you’re a cosplayer.

541440_10200689566543464_649169416_nThis blonde short base wig I used for my Kid cosplay only cost me PHP15o (4USD), and it was neither shiny nor sparse. I hair-chalked some dark brown steaks in it to make it more brown-blonde and give it more depth. I wish I could buy some more of these wigs from the shop I got them from, but they’ve all been sold out. If they stock these again I’m going to buy aaaaaallll of them, I swear! One or more of each color!

Buuuut today, we’re dealing a with a wig that’s also cheap, but SHINY AND SPARSE.

synth1

Continue reading

Tutorial: Vanellope Hair Candies

EVERYONE MIGHT THINK I’m slightly insane posting cosplay craft tutorials when I make a living making cosplay items for others. Yes, I think I’m slightly run mad, but I also want to spread the creativity in the cosplay community! There are a lot of creative individuals locally in the cosplay scene but the big mass is still made up by those dependent on others and those who want to be better informed. Thise goes out to all of theeem.

547858_10200690008354509_529009528_n

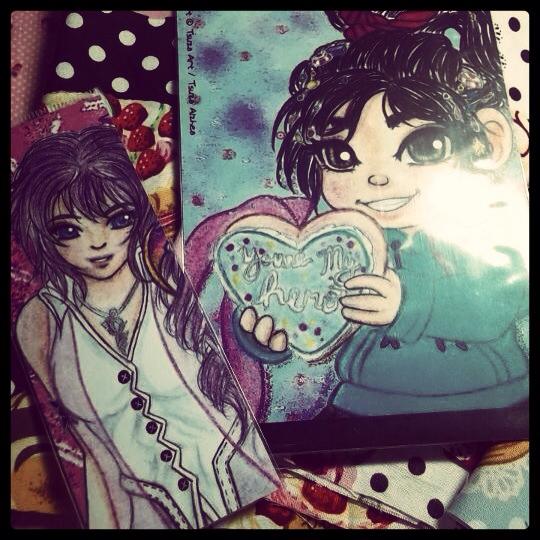
Lovely print of Vanellope from Tsuza Art!

I get commissioned to make Vanellope’s licorice hair tie a lot! So it was just about time someone commissioned me for all the candies in her hair. For the most part, you can buy an assortment of small, colorful clips in bargain stores and accessory shops. But if you want to be extra accurate and have some clay lying around, you can get creative and do-it-yourself~!

NOTE: I do not recommend trying this out if you don’t have the materials already! These things come in multiple colors and buying multiple colors of clay is quite pricy. If you have some at home though, this would be great! But some of the these will also work with Air Dry Clay instead of Polymer–just make sure you have a sealant/Mod Podge for it.

906832_182034665280880_1638519892_oThis is the set I’ll show you how to make: Round candies, sprinkles, a heart and a star, gummy bears, and mints. This is the finished product from my shop. 😀

Continue reading

Cosplay is Expensive? Here are some solutions!

I READ RECENT A RANT in a cosplay group by some random person saying “Cosplay is too expensive!” and “Why are all the costumes so expensive can anyone there just let me borrow a costume please? Because I need to cosplay because I am so handsome and hot I look like Cloud Strife”. Needless to say, that got on my nerves. Because this person actually didn’t mean it as a joke.

I easily feel attacked when I read posts like that, because I’m a cosplayer that operates on a real tight budget. When people say “it’s not possible”, I want to tell people that it IS possible. You just need time, effort, and a lot of creativity.

With that being said, let me tell the story of our first cosplay and how we conquered the “Cosplay is Expensive” problem.

0o0o0o0oo0o0o0

LO AND BEHOLD, welcome everyone to my (our) first cosplay evveerrr. Our Final Fantasy VII Group cosplay in the year 2010. You can obviously see a point just from this one photo of how we did what we did. (I’m the Yuffie Kisaragi, by the way) And our group actually won “Best Group Cosplay” in two major cons, Toycon 2010 and AME1UP 2010–which I say not to brag, but to make a point that even with “non-expensive” cosplay, people recognize it and judge it as good enough.

Continue reading

Tutorial: Wreck It Ralph Hero Medal

This item was commissioned from me by the same sweet lass who commissioned Vanellope’s licorice tie. It’s a Hero Medal from Wreck-it-Ralph. I admit I had a bit of trouble doing it and had to do it more than once, which isn’t pretty ideal. I also tried a new brand of clay for it, so my work was shakier than I would have wished. But here is the tutorial!

As usual, let us start with our reference:

And the materials you’ll need to make this pretty shiny medal is as follows:

  • Gold Polymer Clay (I used approx 75g for a 4 1/2 inch medallion)
  • Paper and Pencil
  • Compass (or any tool to draw the perfect circle)
  • Gold Pearl-Ex/Mica powder (optional but highly recommended!)
  • Blue ribbon

You will also need the usual tools you need to work with polymer clay: acrylic rollers, a non-stick surface, an an oven to bake with.

First Step!

medal1

Continue reading